MockMechanics is a sandbox building game and a mechanical/visual programming language. MockMechanics also uses only simple blocks and graphics, and an intuitive programming form to create complex interactive mechanisms.
Build Instructions:
- tree structure:All machines are 3d tree structures of parts, so each part has a parent. You can add a part to the ground first, then add parts to that part, and so on to create the structure you want. When you move a widget, all its children move with it.
- model:The program has different modes (selected on the right button bar), each view has the same 3d environment, but allows you to interact with it in different ways, eg add mode allows adding objects, edit mode allows zooming and moving.
- value:Each part has a value associated with it, and the meaning of that value depends on which part it is. The trajectory value represents its rotation from 0 to 1, where 1 is 360 degrees. The wagon value is the distance from the starting point on the orbital path it is on, and the button (and block) value is 1 when pressed and 0 otherwise. The light value is 1 when it is on and 0 when it is off.You can do this by setting its value to 1run the chip, or play sound from the speakers. The value of a probe is 1 when it touches another probe, and 0 otherwise.
- Behavior:To make things move (or press buttons, lights, etc.), add it to the graphics chip part and run the graphics. The graph has time (in seconds) on the x-axis, that is, values on the horizontal and y-axis. For example, a graph function that orbits from (0,0) to (1,1) will, when run, rotate the orbit 360 degrees in 1 second.
- decision making:To link the behavior of one component with the behavior of another component (such as running a chart when a button is pressed), you need to use a board component to connect the values of these components. Any function that can use logic gates to make the output the input. When the board is called (when one of the trigger inputs changes), it calculates and sets the value of its output to zero or one. For example, let’s say you connect a button pin directly to a light and set the button as a trigger (by default). The light turns on when you press the button and turns off when you release it. A button press and release runs the board (because the button is the trigger) and since the light is connected to the button, it becomes the same value as the button, 1 (button pressed, light on) or 0 (button released, light off). Or you can use a probe to check what’s going on in the world, e.g. run the chip when a button is pressed and the block is close to it.
- Settings: Some preferences can be set by modifying the settings.clj file in the root directory.
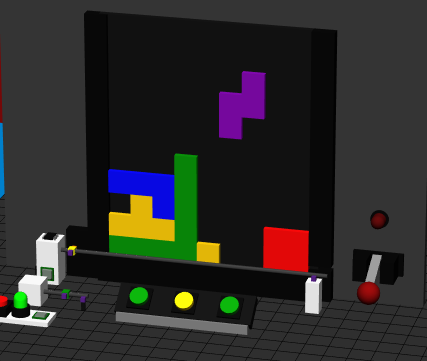
MockMechanics has a real physics engine, and you can use MockMechanics to make some very interesting things, including playable instruments, prototypes of machinery, visual representations of algorithms, games, and many other things. For example, the picture below is a Tetris game created in MockMechanics.
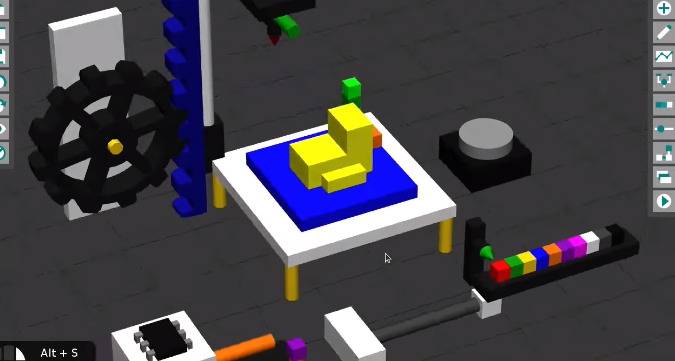
MockMechanics is written in clojure, so in addition to the visual programming of dragging blocks directly, you can also choose to use clojure as a scripting language to control the behavior of the work. For example, you can build a robotic arm (easy, a bit like building a Lego), and use clojure to make it pick up objects.
#MockMechanics #Homepage #Documentation #Downloads #Sandbox #Building #Games #News Fast Delivery